How Long to Boil Chicken Breast: Get It Perfect Every Time
Ever wondered why some chicken breasts turn out tender and juicy while others end up dry and tough? The secret lies in the cooking process, particularly when boiling. This method is not only foolproof but also versatile, making it a go-to for many home cooks.
Boiling chicken breasts ensures they reach the USDA-recommended internal temperature of 165°F, guaranteeing safety and flavor. Whether you’re prepping for salads, soups, or casseroles, this technique offers both cooked meat and a flavorful broth. The cook time varies based on factors like size and whether the breast is bone-in or boneless.
Thinner cuts may take around 10 minutes, while larger ones could need up to 15 minutes. Using a meat thermometer can help you achieve perfect results every time. Plus, one breast can yield approximately 2 cups of shredded meat, making it ideal for meal prep.
Key Takeaways
- Boiling ensures tender and juicy chicken breasts.
- Cook time varies by size and bone presence.
- USDA recommends an internal temperature of 165°F.
- Perfect for meal prep and multiple recipes.
- Yields both cooked chicken and flavorful broth.
Table of Contents
Boiling vs. Poaching: What’s the Difference?
Many home cooks confuse boiling and poaching, but the differences are significant. While both methods involve cooking in water, the temperature and technique vary greatly, affecting the final texture and flavor of the meat.
Poaching is a gentle method that uses heat below the boiling point, typically between 180-190°F. This allows proteins to coagulate slowly, preserving moisture and tenderness. On the other hand, boiling occurs at 212°F, which can cause proteins to tighten quickly, often resulting in tougher meat.
One key to successful poaching is the cold start technique. Starting with cold water ensures even heat distribution, preventing the outer layers from overcooking before the center is done. This method also helps break down collagen in connective tissues, yielding tender results.
Here’s a quick comparison of the two techniques:
| Aspect | Boiling | Poaching |
|---|---|---|
| Temperature | 212°F | 180-190°F |
| Texture | Can be tough | Tender and juicy |
| Moisture Retention | Lower | Higher |
| Technique | Rapid bubbling | Gentle simmering |
Using the right cooking liquid is also crucial. Adding salt, herbs, or spices to the water enhances flavor, making poached chicken a versatile ingredient for various dishes. Whether you’re aiming for a tender salad topping or a flavorful soup base, understanding these methods can make all the difference.
How Long to Boil Chicken Breast
Cooking chicken to perfection requires precision and the right techniques. Whether you’re working with boneless, skinless cuts or bone-in pieces, understanding the timing and tools is essential. Let’s break down the details to ensure your chicken turns out tender and flavorful every time.
Boneless, Skinless Breasts
Boneless, skinless chicken breasts are a popular choice for their convenience and versatility. These cuts typically take between 8 to 15 minutes to cook thoroughly. The exact time depends on the size and thickness of the meat. For example, a 12-ounce breast may need closer to 15 minutes, while an 8-ounce piece could be done in 10.
To ensure even cooking, start with cold water and bring it to a gentle simmer. This method helps retain moisture and prevents the outer layers from overcooking before the center is done. Always check the internal temperature with a thermometer to confirm it’s reached 165°F.
Bone-In, Skin-On Breasts
Bone-in, skin-on chicken breasts require a bit more time, usually between 20 to 30 minutes. The bone conducts heat more slowly, so these cuts take longer to cook. The skin also plays a role in flavor retention, adding richness to the meat.
When cooking bone-in pieces, it’s important to monitor the internal temperature at the thickest part of the meat. This ensures the entire piece is cooked safely. Remember, carryover cooking will continue to raise the temperature slightly after removing it from the heat.
Using a Thermometer for Perfect Doneness
A thermometer is your best tool for achieving perfectly cooked chicken. Insert it into the thickest part of the meat, avoiding the bone, to get an accurate reading. The USDA recommends an internal temperature of 165°F for safety and optimal texture.
Visual cues can also help. Look for clear juices and firm, opaque flesh. However, relying solely on appearance can lead to overcooking, so always use a thermometer for precision.
By following these guidelines, you’ll master the art of cooking chicken to perfection. Whether boneless or bone-in, the right techniques ensure tender, juicy results every time.
Step-by-Step Guide to Boiling Chicken
Mastering the art of boiling poultry starts with the right tools and techniques. Proper preparation ensures tender, juicy results every time. Let’s dive into the essential steps to achieve perfection.
Starting with Cold Water for Even Cooking
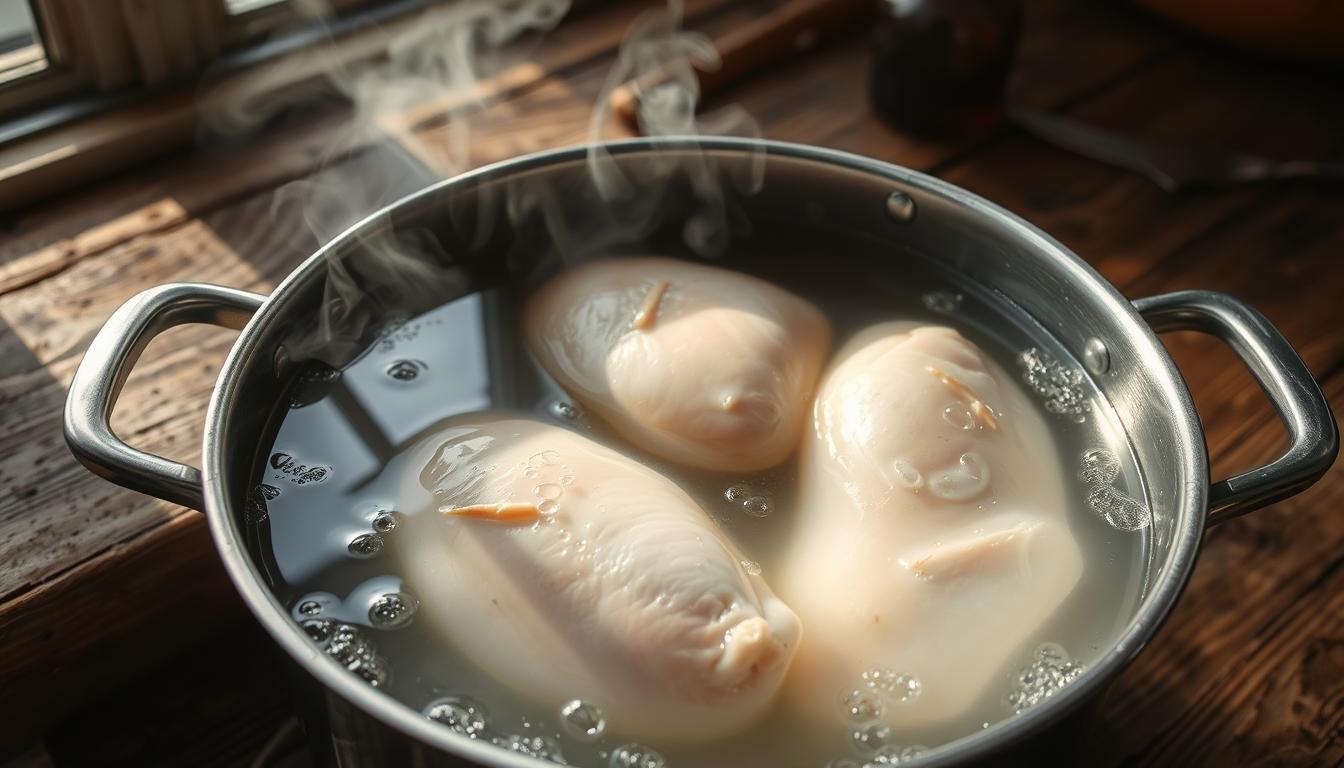
Using cold water is crucial for even heat distribution. This method prevents the outer layers from overcooking before the center is done. Here’s how to get started:
- Choose a large pot (at least 8 quarts) to accommodate the meat and liquid.
- Add enough water to fully submerge the chicken for consistent cooking.
- Place the chicken in the pot before heating to ensure a cold start.
Seasoning the Liquid for Maximum Flavor
Enhancing the cooking liquid with aromatics and seasonings adds depth to the dish. Here’s how to create a flavorful base:
- Add 1 tablespoon of salt per quart of water for balanced seasoning.
- Layer aromatics like garlic, onion, and herbs such as thyme or parsley.
- Consider adding citrus or vinegar for a subtle acidic balance.
| Ingredient | Purpose |
|---|---|
| Salt | Enhances flavor and seasons the meat |
| Garlic | Adds depth and aroma |
| Herbs | Infuses the broth with fresh flavors |
After cooking, strain the liquid to create a versatile broth for soups or sauces. Proper seasoning and technique ensure every bite is packed with flavor.
Pro Tips for Juicy, Tender Chicken
Achieving perfectly tender poultry doesn’t have to be a mystery. With a few simple techniques, you can avoid common pitfalls and ensure your meat stays flavorful and moist. Let’s explore how to elevate your cooking game.
Avoiding Overcooking with Low Heat
One of the easiest ways to ruin poultry is by cooking it at too high a temperature. Using low heat ensures the meat cooks evenly without drying out. Start by bringing the water to a boil, then reduce the heat to maintain a gentle simmer. This method prevents proteins from tightening too quickly, which can lead to tough, rubbery results.
Another key tip is to monitor the internal temperature. Remove the meat from the heat when it reaches 150-155°F and let it rest. The residual heat will bring it to the safe internal temperature of 165°F while keeping it juicy.
Best Herbs and Aromatics to Add
Enhancing the flavor of your poultry is easy with the right herbs and aromatics. Here are some top choices to consider:
- Garlic: Adds depth and richness to the dish.
- Rosemary: Perfect for a robust, earthy flavor.
- Lemon zest: Brightens the taste with a citrusy note.
- Thyme: Complements poultry with its subtle, herbal aroma.
Pairing these ingredients with your cooking liquid infuses the meat with flavor, making it versatile for various dishes.
Here’s a quick guide to herb pairings by cuisine:
| Cuisine | Herbs |
|---|---|
| Mediterranean | Oregano, thyme, rosemary |
| Asian | Ginger, cilantro, lemongrass |
| Mexican | Cilantro, cumin, chili powder |
By following these tips, you’ll transform your poultry into a tender, flavorful dish every time. Whether you’re cooking for a weeknight dinner or meal prep, these techniques ensure success.
Storing and Using Boiled Chicken
Proper storage keeps your cooked poultry fresh and ready for quick meals. Whether refrigerating for the week or freezing for later, these methods ensure flavor and safety.
Refrigerating for Meal Prep
Store cooked meat in an airtight container in the fridge for up to 5 days. For meal prep, portion shredded chicken into smaller pieces for easy use in salads or wraps.
Tips to maintain quality:
- Use vacuum sealing or ziplock bags to reduce air exposure.
- Label containers with dates to track freshness.
- Preserve broth in ice cube trays for single-serving recipes.
Freezing Shredded Chicken
Freezing extends shelf life up to 3 months. Follow these steps for best results:
- Cool meat completely before packing.
- Divide into portions to avoid thawing unused amounts.
- Wrap tightly to prevent freezer burn.
| Method | Duration | Best For |
|---|---|---|
| Refrigeration | 3-5 days | Short-term use |
| Freezing | 3 months | Long-term storage |
For defrosting, move frozen pieces to the fridge overnight. Reheat gently to retain moisture.
Creative Ways to Use Boiled Chicken
Transform your boiled chicken into versatile dishes that save time and elevate meals. Whether you’re meal prepping or cooking for a crowd, this ingredient is a game-changer. Let’s explore how to make the most of it.
In Salads, Soups, and Casseroles
Boiled chicken shines in a variety of dishes. Here are some standout ideas:
- Salads: Combine shredded pieces with crisp greens, fruits, and nuts for a refreshing meal. Try a Chicken Caesar Pasta Salad for a hearty twist.
- Soups: Use it as the base for comforting recipes like White Chicken Chili or Chicken Noodle Soup. The tender meat pairs perfectly with rich broths.
- Casseroles: Mix shredded chicken with grains, cheeses, and sauces for dishes like Chicken Broccoli Rice Casserole or Chicken Enchilada Bake.
Making Broth from Cooking Liquid
Don’t discard the cooking liquid—it’s a flavorful foundation for soups and sauces. Here’s how to fortify it:
- Strain the liquid to remove impurities.
- Add aromatics like garlic, onion, and herbs for depth.
- Use it as a substitute for water when cooking grains like rice or quinoa.
| Use | Benefit |
|---|---|
| Soup Base | Adds richness and nutrients |
| Grain Cooking | Enhances flavor of rice or quinoa |
| Sauce Base | Creates a savory foundation |
By repurposing the cooking liquid, you not only reduce waste but also elevate the flavor of your dishes. It’s a simple yet impactful way to enhance your recipes.
Conclusion
Cooking poultry to perfection is easier than you think with the right approach. For boneless cuts, aim for 8-15 minutes, while bone-in pieces may need 20-30 minutes. Always use a thermometer to ensure the internal temperature reaches 165°F for safe, perfectly cooked results.
Don’t discard the cooking liquid—it’s a flavorful broth that can enhance soups or sauces. Experiment with recipes like salads, soups, or casseroles to make the most of your juicy meat. Storage is flexible; refrigerate for up to 5 days or freeze for 3 months.
This method not only saves time but also offers health benefits, being high in protein and low in fat. Share your favorite recipes and inspire others to try this versatile way of cooking. Happy cooking!
FAQ
What’s the difference between boiling and poaching chicken?
How do I know when the chicken is fully cooked?
Should I start with cold or hot water?
What’s the best way to season the cooking liquid?
Can I use the leftover cooking liquid?
How long can I store boiled chicken in the fridge?
Can I freeze boiled chicken?
What’s the best way to avoid overcooking?
What are some creative ways to use boiled chicken?
Source Links
- How to Boil Chicken Breasts: Our No-Fail Method for Juicy Chicken – https://www.bhg.com/recipes/chicken/breasts/how-to-boil-chicken/
- How to Boil Chicken – https://feelgoodfoodie.net/recipe/how-to-boil-chicken/
- How to Boil a Chicken – https://www.pillsbury.com/how-to/prep-method/boil-chicken
- Poached Chicken Thighs Made Easy! – https://www.laurafuentes.com/poached-chicken-thighs/
- I have finally figured out how to poach chicken – https://marianbull.substack.com/p/i-have-finally-figured-out-how-to
- Foolproof Tender Poached Chicken Recipe – https://www.seriouseats.com/how-to-poach-chicken-recipe-8641609
- No Rotisserie Chicken? Here’s How To Boil Chicken For Any Recipe – https://www.delish.com/cooking/recipe-ideas/a22826207/how-to-boil-chicken/
- Follow These Simple Instructions to Boil Chicken Without Drying It Out – https://www.countryliving.com/food-drinks/a60777997/how-to-boil-chicken-correctly/
- How Long to Boil Chicken Breast – D&D Poultry – https://ddpoultry.ca/how-long-to-boil-chicken-breast/
- How to Boil Chicken: 13 Steps (with Pictures) – wikiHow – https://www.wikihow.com/Boil-Chicken
- How to Boil Chicken Breasts | Perfectly Poached Chicken — Cooking with Anadi – https://www.cookingwithanadi.com/recipes/simple-poached-chicken
- How Long to Boil Chicken? (Quick Glance Time Chart!) – https://foodess.com/article/how-long-to-boil-chicken/
- I Asked 5 Chefs the Best Way To Cook Chicken Breasts—They All Said the Same Thing – https://www.simplyrecipes.com/best-way-to-cook-chicken-breasts-chefs-8733024
- How to Boil Chicken for a Week’s Worth of Meals – https://www.epicurious.com/ingredients/how-to-poach-boneless-skinless-chicken-breasts-for-easy-meals-article
- How to Make Shredded Chicken: Easy Boiling Method for Chicken Breast – https://beatthebudget.com/recipe/how-to-make-shredded-chicken-easy-boiling-method-for-chicken-breast/
- 98 Creative Chicken Recipes For Weeknights When You Don’t Even Want To Think About Dinner – https://www.delish.com/cooking/recipe-ideas/g2972/chicken-weeknight-dinners/
- How to Make Shredded Chicken – https://www.wellplated.com/how-to-cook-shredded-chicken/
- 50 Leftover Chicken Recipes You’ll Want to Eat – https://www.tasteofhome.com/collection/leftover-chicken-recipes/?srsltid=AfmBOopMQ0bIiyfYLiSFWaolDW-3WOCyhWRRTCT541Z5mgA5CWxhedef
- How Long to Boil Chicken Breast? (Best Cooking Times & Tips) – https://www.queerdompls.com/how-long-to-boil-chicken-breast-best-cooking-times-tips/
- The 6 Mistakes You Make When Cooking Chicken Breasts – https://www.simplyrecipes.com/chicken-breast-mistakes-food-pro-8687735
- Does Chicken Breast Get Softer the Longer You Cook It? – https://chefiq.com/blogs/blog/does-chicken-breast-get-softer-the-longer-you-cook-it?srsltid=AfmBOopqogXjTrmk2_h4kfm2IfwodHZw7Z6pIAnrBAodB5HVDKhDTXDU

